I have been tasked with redesigning my company’s web site. Looking at it, it really is poorly designed, hard to navigate, and a little bit lackluster in graphics and design. While I am no designer, I do have a skill with the web, an objective view of the site, and the drive to fix this. I have been making changes to the live site, testing out templates, changing graphics. This is a really lame thing to do to a live site.
This post is long and can be complex. If you get stuck on a certain part- please post a comment. I will get back to you within an hour or two.
We run Hostmonster.com web hosting.
This runs a Joomla! 1.5.15 website.
All files are transferred via FTP to Hostmonster.com.
All configurations take place in the Administrator section of Joomla!
I had the epiphany that it is pretty dangerous to mess with a live site, so I decided it would be in my best interest to download a copy of the site to my PC, edit it, then replace the current site when it is done. To do this I need a copy of the web server at Hostmonster.com. They use a LAMP, which is Linux-Apache-MySQL-PHP. Now I could use VirtualBox to install Ubuntu on my laptop, and run a LAMP from there. the problem with that is then I would have to configure the virtual OS to communicate via my network, which in my experience can be a pain in the butt.
So instead, I will use a WAMP server. WAMP Server 2 has been released while it is not the recommended program levels listed by Joomla!, it is what I will use.
First, uninstall IIS if it is on your computer. My laptop did have it installed, so go to Add/Remove Programs, then turn Windows Features On or Off. Uncheck Internet Information Services, uninstall, and reboot.
Now, go and download WAMP Server 2 from here.
Once you download the file, run it, and click-through the install steps. I put mine on the D:\ drive because it has good space. I also left all of the install options at default values, such as Browser Choice, SMTP Server, and Email Address. This may not be what you want personally, but for me it works. There is a great tutorial with pictures listed here– Thanks TeamTutorials!
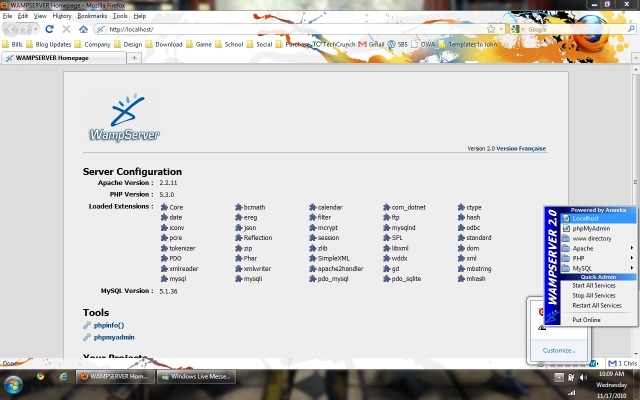
A good way to see if your server is online is to left-click the icon in your tray, and then select Localhost. If you get a page looking like this one, WAMP Server 2 is configured and running.
Keep in mind, that I have very little experience with Apache, PHP, MySQL including setup and install of a web site. In the past I used IIS 5, 6, and 7, SQL Server Express 2005, and Standard 2006. As much as I would love to copy this website using those technologies, the migration would be more trouble than it is worth.
So, now let’s get Joomla up and running.
Go to the Joomla! website and download the package, which can be found here. They only have the full install for 1.5.22 available, though there are updates for 1.5.15. I will have to deal with installing the newest version and see if it works- if it doesn’t I can always start over.
Upon further exploration, they do have the full package of 1.5.15 available here, so I downloaded that instead. Note: Make sure you download the release.ZIP file, which is appropriate for Windows installations.
I also went here, and downloaded the Installation Manual PDF and printed it.
Before we start the Joomla! install, you can double-check that MySQL, XML, and Zlib functionality is enabled by checking the PHP.ini file, which is located at: %installdir%/camp/bin/php/php5.3.0
Furthermore, lets check the installation using a PHP script. Open Notepad (Start>Run>Notepad)m and type the following into the text file.
<?php
//Show all information
phpinfo();
?>
Save this file and name it as phpinfo.php, and put it in the root of your site, which is Localhost at this time. This is located at: %installdir%/wamp/www
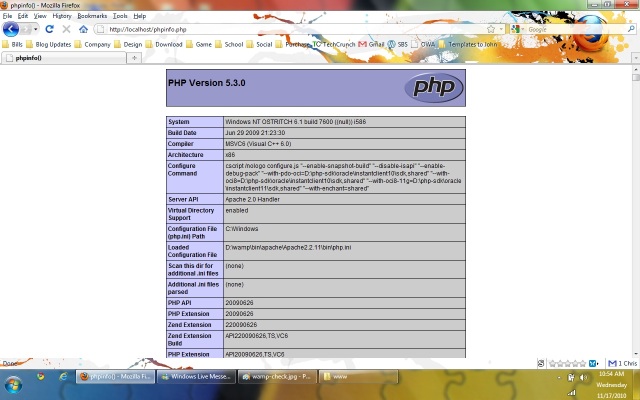
So save the file phpinfo.php in that directory, which will only have one file in it, index.php. Open up the web browser you used for the WAMP Server 2 install, and type http://localhost/phpinfo.php in the address bar. It should display a page like this:
After you check this output- which contains information about your system and WAMP, MAKE SURE TO DELETE THE PHPINFO.PHP FILE!
Now we unzip the Joomla! zip file we downloaded from their site. I extracted it to a folder on my desktop for ease of moving. I use WinRAR, there is also WinZIP, 7-ZIP, Windows built-in, and many more.
Before beginning the Joomla! install, which will add and edit files to the WAMP Server 2 installation, I would like a backup in case things go wrong, so that I can start over. I will let you choose how to back them up, I simply created a restore point of that drive, as well as copied the WAMP folder to a remote location. Overkill maybe, but we will see.
Since we are doing a Localhost install, we simply need to copy the unzipped Joomla! files into our web root, which is located at: %installdir%/wamp/www/
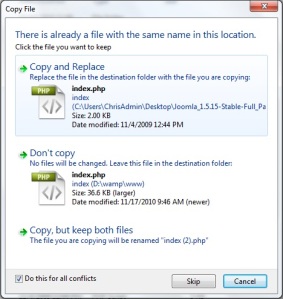
You will get a pop-up asking if you want to overwrite index.php– select copy and replace.
Now navigate to http://localhost, or click the WAMP server icon from your task bar and select Localhost.
Select your language and click next.
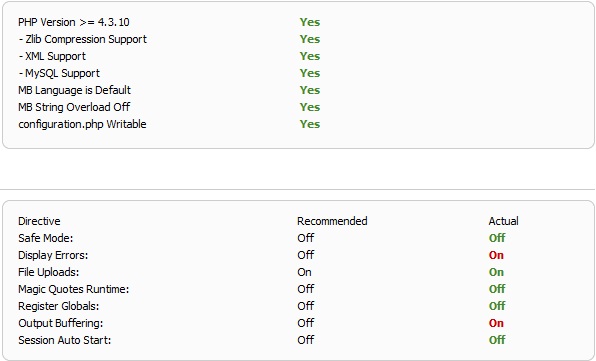
Make sure a green Yes is displayed next to all items of the pre-installation check. If any of them say no (They shouldn’t if you follow these instructions), you should stop here and correct the problem by installing a supported version of the problem, or by Googling the exact problem.
Recommended settings are nice, and typically I would follow them. In this instance, I am going to leave them alone- which is with two red items. They are for Display Errors, and Output buffering- both of which I want.
Hit next a few times untill you get to the Database Configuration screen.
Database type is MySQL.
Host name is Localhost.
If you did the default install the user name is root.
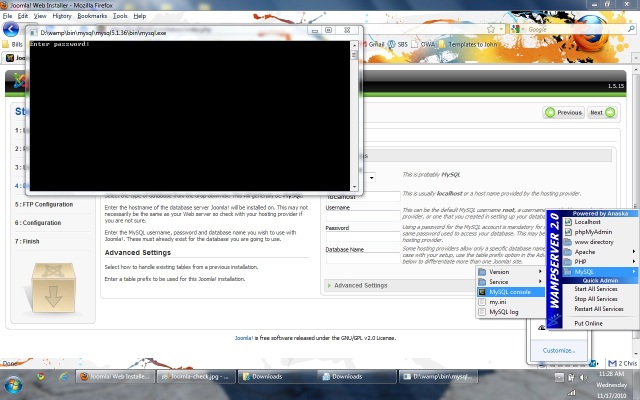
There is no default password. I am not a fan of not having a password, so I am going to add-on. Click the wamp icon in your tray. Click MySQL>MySQL Console.
This opens up a DOS looking box asking for a password. Hit enter. You are now at the MySQL command prompt. Use this command to set the root password.
SET PASSWORD = PASSWORD(‘password‘);
The italicized text is your actual password. Hit enter, and exit out of the MySQL Console. Back in your Joomla! Installation, enter the password you just set in the password field.
At this point I realize I am going to be restoring a backup of my already configured remote web site, which has a user name and password, a database name, etc. I went to my hostmonster account and clicked MySQL Databases from the control panel, and found out my information is:
Manage User Privileges
User: ********_jml01
Database: ********_jml01
Since I have no ide what is going on with MySQL, I am going to use the default set up, root, with my password, and default database. Ill remember this spot if I run into problems later.
After a few tries of not being able to create or connect to any database, I checked MySQL and found out that there was no database. At the MySQL prompt type SELECT DATABASE(); and it will return a value of NULL.
Click on the wamp icon in your tray, and select PHPMyAdmin
Enter the database name for Create New Database. In this case I named it the same name that the one on my Hostmonster.com server is named.
Back on the Joomla! install, enter that database name and hit next. I entered the site name of my live site, which is found under Global Configuration on the site. I set up my user name/email and password. I also did not select migrate or local files. Once you enter the top information just hit next.
You now have to remove the installation directory from the %installdir%/wamp/www/ directory. Just delete it.
Now, enter http://localhost/administrator in your web browser.
Login with the user name admin, and whatever password you just entered several seconds ago.
Alright, this is where things got confusing for me. I have working backups of my live site using Hostmonster.com’s backup utility, which is in the control panel. This is not what we need, or at least what i need.
What we will do now is download two packages.
Akeeba Backup 3.1.4which needs to be installed of both live and local Joomla! sites, and
Akeeba Kickstart 3.1.5, which needs to be installed only on the local Joomla! site.
This will take different setup on both the live and localhost sites.
Live site:
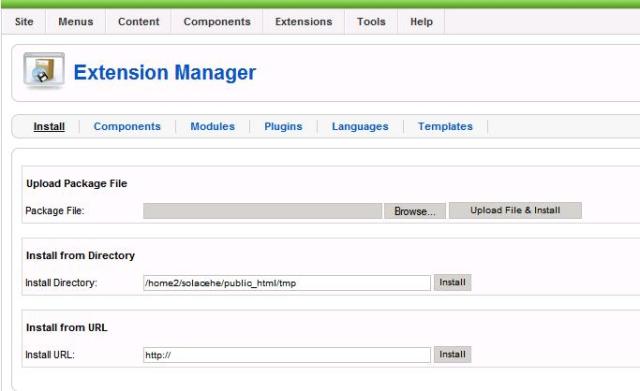
Go to your sites administration, click Extensions>Install/Uninstall.
Click browse, and select the file. I downloaded this file to the computer I am installingmy Joomla! local site to. Now click upload and install. You will get a success page.
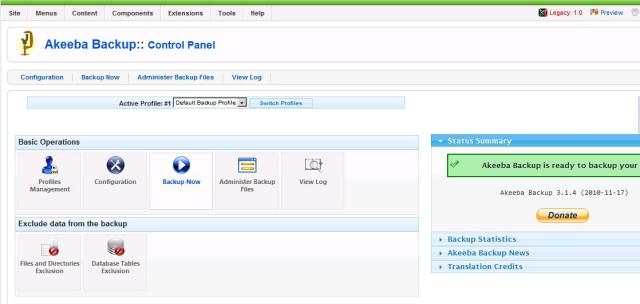
Might as well start the backup now. Go to Components>Akeeba Backup, and select backup now.
Now on your Local server (PC):
Install it the same way, except we don’t need to upload it to Hostmonster.com. Go to your localhost administrator settings, Extensions>Install/Uninstall. Select the file from your local PC, and install it. Now extract the kickstart zip. You will be looking at some files. Select them all drop drop them into the root of your site on localhost, or %installdir%/wamp/www/
Now we need to get the Akeeba backup onto our localhost. I downloaded vie the web browser- you should not do this, it may corrupt the file. The reason I did this was because I could not find the backup vie FTP on my site.
Once you have the backup file, put it in the same directory of your localhost that you put the kickstart files into, which is the root directory WWW.
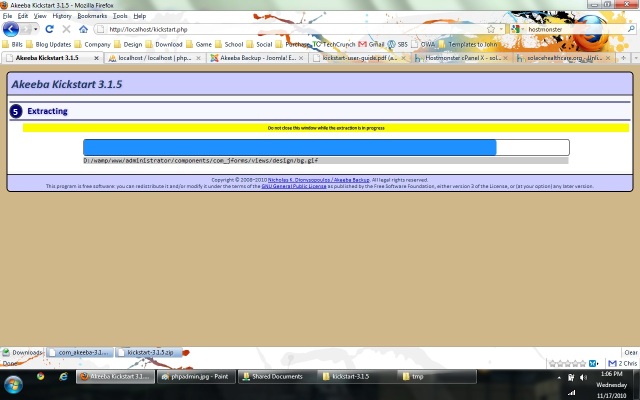
You will get a bar like this one.
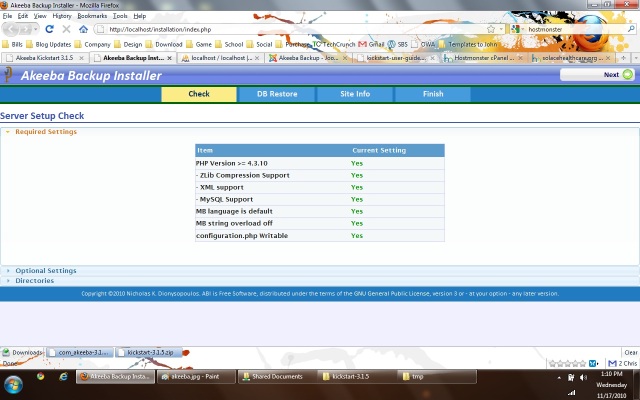
Once this completes, you will se a green button, click it to run the installer and restore.
You can check over the things on this page, specifically check the directories tab near the bottom to make sure your directories are correct.
Click Next.
Set Connection Parameters to match what you selected when setting up Joomla!. User root, the password, and the database. Mine is ********_jml01.
Click next, leave the default values alone. I entered my sites public address, and did not force overwrite temp directory placement. Hit finish, close the window back to Akeeba Kickstart, and select clean up now.
Click view your site’s front end- there is your copy!

